How to Start a Seed Business
As modern agriculture has trended toward mass production of a limited number of crops, it has become more important than ever for individuals to save and exchange less common varieties of seeds. The genetic diversity contained the countless varieties of available seed stocks provide us with a wealth of plants with culinary and medicinal value. This variety safeguards us against narrowly adapted plant pathogens that could easily wipe out an entire food supply, as in the case of the Irish potato blight during the 19th century. Starting a seed business is one way to help preserve the invaluable resource of seed stocks that has the potential to keep us safe and healthy and greatly improve the way we eat.
○ Decide on a focus for your seed business, such as culinary or medicinal herbs, or organic fruits or vegetables. Research existing seed companies looking for an open niche you can fill or a specialty that is underrepresented.
○
○ Start building a seed bank with seed stocks consistent with the focus you have chosen for your business. Buy and exchange seeds with fellow seed savers, and grow plants and harvest their seeds to begin building your inventory.
○
○ Design packaging for your seeds. Include information about the appearance, flavor and uses of the different plants, as well as instructions for planting and harvesting them, including the best temperature and season, seed spacing recommendations and ideal seed planting depth.
○
○ Design a website and a catalog for your seed business. Include information about your company’s focus. Tell a story about why you decided to start a seed company and what you uniquely offer. Prepare descriptions and pictures of the plants that customers can grow from each of the seed varieties you offer. Include a paper order form in your print catalog and a secure online ordering form on your website.
○
○ Market your seed business at events targeted to gardeners, such as gardening shows and plant sales. Open wholesale accounts with gardening stores and natural foods stores. Place online advertisements on gardening blogs, and start a blog of your own to attract potential customers to your seed selling site.
How to Start a Business Selling Flower Seeds
When most individuals think about starting a business, selling flower seeds may not be their first idea of a successful, profitable business. However, this can be a very rewarding business with which you can make money and do something great for the earth.
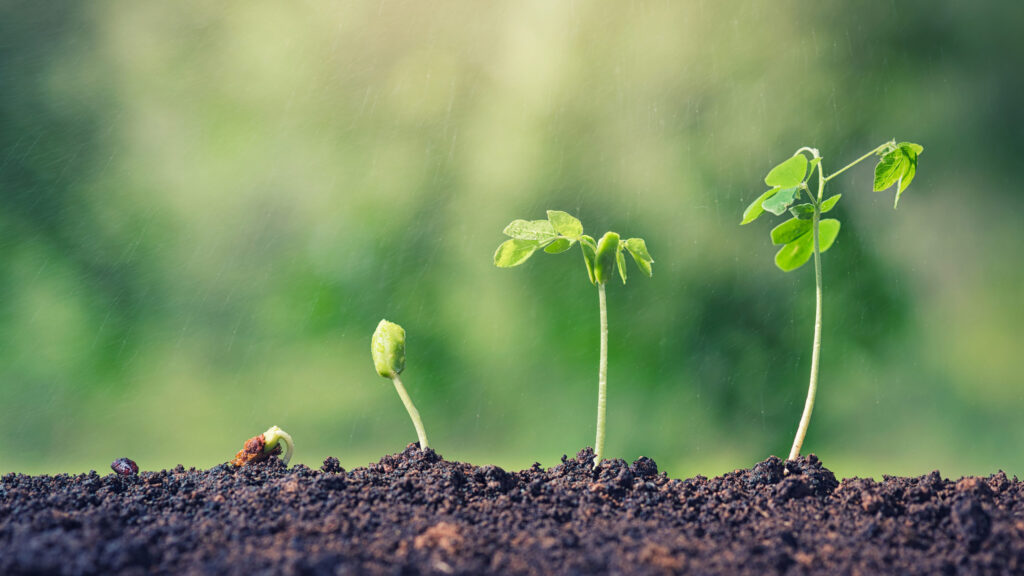
How to Start Seeds
Here are a few good reasons:
● Starting plants from seed is less expensive
● There are many more varieties to choose from
● You can grow higher-quality plants
● You will get to enjoy the simple satisfaction of growing your own plants from seed to harvest.
To be successful, you’ll need to provide the right conditions for good germination and healthy growth. Here are the basics:
If you are a beginning seedstarter, start with “easy seeds” that are quick to germinate and don’t require a lot of extra fussing. It’s easy to get carried away and buy too many different packets of seeds. If you are starting seeds for the first time, you may want to limit yourself to no more than ten different types of plants.
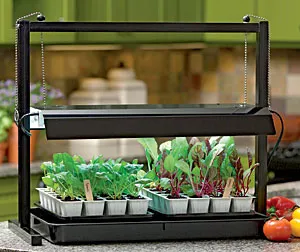
The Compact Tabletop Jump Start Kit includes everything you need to start some seeds:
● The Compact Tabletop SunLite Garden
● Two Fast Start 24-Cell planting trays
● One brick of Eco-co Coir (makes 10 qts.)
● One 2.5 oz. jar of Plant Health Care fertilizer
● 50 wooden plant markers
Choosing the Right Containers
You can start your seeds in almost any type of container as long as it is at least 2 to 3 inches deep and has some drainage holes. For best results, we recommend a seedstarting system, such as our Fast Start Seedstarter. For tomatoes and peppers, you may want to start your plants in a seedstarting system and then “pot up” to larger containers, such as biodegradable Cowpots. Some gardeners always plant their seeds in little rows in a larger flat. Once the tiny seedlings emerge, they get separated and replanted into individual containers.
The Best Growing Medium
To provide the optimum growing conditions, and to avoid disease and insect problems, seeds should be started in a soilless growing mix, not in garden soil. A good blend is fine-textured, moist and spongy.
You can purchase a ready-mixed blend, or mix your own, using 1/3 vermiculite, 1/3 perlite, 1/3 milled sphagnum moss. Remember that soilless mixes contain few, if any, nutrients. You will need to start feeding your seedlings with liquid fertilizer a few weeks after they germinate, and continue until you transplant them into the garden. Plant Health Care is formulated especially for seedlings.
After your seedlings are six to eight weeks old, you can transplant them into larger pots with a coarser growing medium, such as our Transplant Mix. If you wish, you can add up to 20 percent garden soil or sifted compost. A standard blend may contain 1/3 compost, 1/3 perlite or vermiculite, and 1/3 sphagnum moss. This will help ensure that your plants have access to some soil nutrients, and it will also help prepare them for life in the garden.
Timing Your Planting
Seeds sprout and plants grow at different rates, so timing is very important. Some seeds, such as celery and leeks, should be started 12 weeks before they are transplanted into the garden. Others, including cucumbers and sunflowers, need only three or four weeks (and will suffer if started too early). Check the seed packet to find the recommended seedstarting times. If you plan to start more than a packet or two of seeds, it helps to create a seedstarting schedule, counting back from the date you plan to set out the transplants.
For more on how to create a customized seedstarting schedule, see When to Start Your Seeds.
If you will be growing your seedlings in a greenhouse or a very warm room, you should subtract at least a week from the recommended planting date. Heat promotes faster growth, and you may find yourself with giant plants that are ready to be put out into the garden before warm weather arrives.
Seedlings that are started very early might need to be transplanted into larger containers after three or four weeks. This is especially true if you broadcast your seeds in flats rather than planting them in individual growing cells. The sooner your plants are put into individual cells with plenty of root space, the happier they will be.
Planting and Caring for Your Seedlings
The growing medium should be thoroughly moistened before it is placed in your seedstarting containers (warm water works best). Fill the trays or containers to within 1/4 to 1/2 inch of the top. You are now ready to sow your seeds. But before you do so, take another look at the seed packet for any special information about pre-chilling, pre-soaking, a preference for light or darkness, or special temperature requirements.
Seeds can either be scattered on the soil surface or placed individually into each growing cell. Resist the temptation to sow too thickly. Most seeds should be covered with a fine layer of soil. Unless the seeds require light to germinate (such as snapdragons), or are too tiny to tolerate being covered (such as petunias), you should cover the seeds to about three times their thickness.Again, read the seed packet for planting instructions.
Gently moisten the growing medium (using a mister or with dribbles of water) to ensure good contact between the seeds and the soil. Label each flat, row, or container with a wood or plastic marker so you can identify them later. Save the seed packet for reference.
Temperature: The temperatures for optimum germination listed on seed packets refer to soil temperature, not air temperature. Though some seeds germinate best at a soil temperature of 60 degrees F, and some at 85 degrees, most prefer a temperature of about 78 degrees.
If the soil is too cold, seeds may take much longer to germinate, or they may not germinate at all. To provide additional warmth, you can use a heat mat or place the containers on top of a warm refrigerator, television, or keep them in a warm room until the seeds germinate. Just be sure to get your seedlings to a sunny window or under lights within 24 hours of seeing little sprouts emerging through the soil surface.
After germination, most seedlings grow best if the air temperature is below 70 degrees F. If temperatures are too warm (over 75), the seedlings will grow too fast and get weak and leggy. Most seedlings grow fine in air temperatures as low as 50 degrees, as long as soil temperature is maintained at about 65 to 70.
Light: Most seeds don’t require light to germinate, but as soon as they sprout, they need to be placed in a south-facing window or under grow lights that are designed for growing plants. Check your seeds daily. Seeds that germinate and start to grow without adequate light will become tall and leggy—a condition that is almost impossible to correct.
Most seedlings require 14 to 16 hours of direct light to manufacture enough food to produce healthy stems and leaves. The characteristic legginess that often occurs when seedlings are grown on a windowsill indicates that the plants are not receiving enough light intensity, or enough hours of light. If your seedlings are in a south-facing window, you can enhance the incoming light by covering a piece of cardboard with aluminum foil and placing it in back of the seedlings. The light will bounce off the foil and back onto the seedlings.
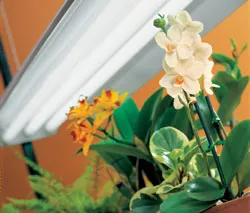
SunLite bulbs are color-balanced to promote healthy growth and abundant blooms.
If you do not have a south-facing window, you will need to use grow lights. When growing seedlings under lights, you can use a combination of cool and warm fluorescents, orfull-spectrum fluorescent bulbs. Incandescent bulbs produce too much heat in relation to the light given off. They also lack the blue-spectrum light that keeps seedlings stocky and dark green.
Seedlings need a high intensity of light. The fluorescent bulbs should be placed very close to the plants—no more than three inches away from the foliage—and should be left on 12 to 14 hours per day. If you are growing your seedlings on a windowsill, you may need to supplement with a few hours of artificial light, especially during the winter months.